Create a Facebook Page
Today I’m creating a Facebook page for one of my websites NaturalHealing.com.au – Here are the steps on how I did it.
[tweetable alt=””]Step-by-Step Tutorial for creating a Facebook Page (including free PDF)[/tweetable]
If you’d like a downloadable PDF of this page, please scroll to the bottom.
Login to Facebook
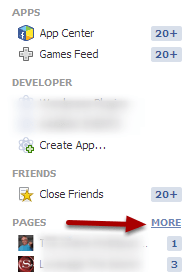
Go to http://www.facebook.com/ and login to your normal facebook account. On the homepage sidebar there are many different areas. Click on “MORE” next to Pages.
Note: If you cannot see “Pages”, then you might have to click on “MORE” under the bottom of your available options (usually way under Favorites, Groups, Apps, etc.. the last one, click on “MORE”)
If you still can’t find it, don’t worry, you can access the page directly by going to https://www.facebook.com/pages/create/
Click “Create a Page”

Then click on “Create a Page”
Choose the appropriate page type
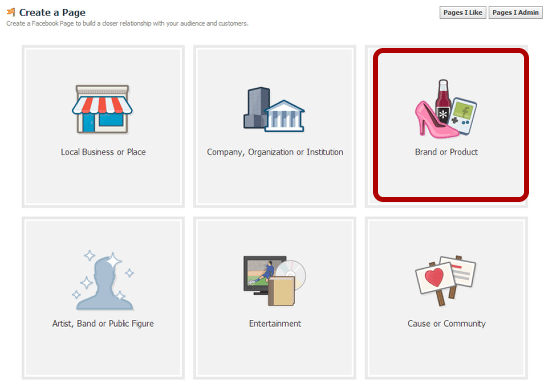
Pick the type of Facebook page you will be creating.
For my NaturalHealing.com.au website, it’s not a business, it’s just a website dedicated to healing naturally, so I will choose “Brand or Product”
Choose appropriate Category
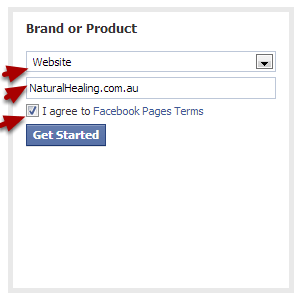
Under the Brand or Product type, I chose “Website” and then put in a name that I want people to see in the next box (don’t worry, this doesn’t affect the “URL”).
Check the box to agree to Facebook terms. Then click “Get Started”
Description and URL
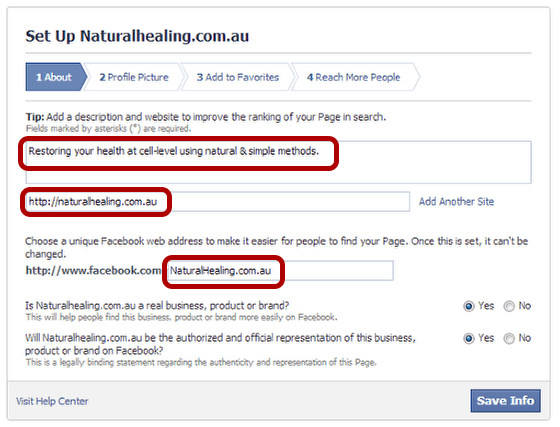
Add a quick description, add your website url, and then the unique Facebook.com url that I wish to have. Then click Save Info.
Note about URL: you want to make sure that this is spelt correctly as you cannot change this later. Ensure you DO NOT use hyphens or symbols EXCEPT fullstops like a website address like I have done.
Because “Naturalhealing” has already been using a million times on Facebook, it is best for me to use my domain name as my facebook url (http://fb.com/NaturalHealing.com.au) but that might not be appropriate for you.
If you are doing it for a business, like happy jacks, then have it as http://fb.com/HappyJacks (no spaces, no hyphens, no dots, etc).
Think of it this way – you want it to be easy to remember, you want to “speak” it to friends, clients, verbally via phone, radio ad, tv ad, etc. Just make it easier to find by not using symbols or hyphens (if you have a hyphen, you have to verbally say the word “HYPHEN” when telling people, and that is going to confuse people).
Add Profile Picture
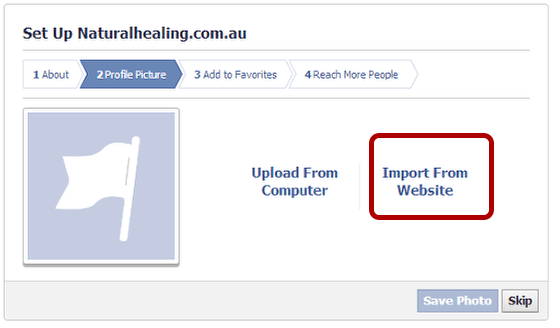
Next I’m going to choose an image to use temporarily as a Profile picture until I create a unique one later.
Choose “Import from Website” (or Upload from computer if you have a picture on your computer to use).
Add Website URL to gather images to choose from.
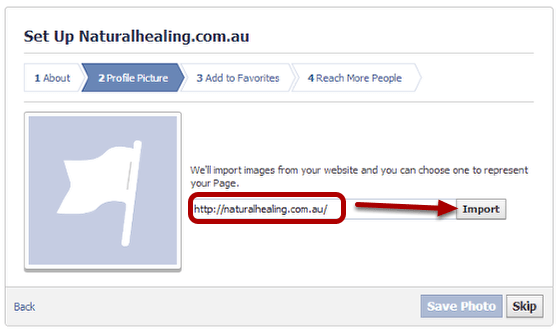
Add your Website URL to gather images to choose from then click on “Import”
Select an Image
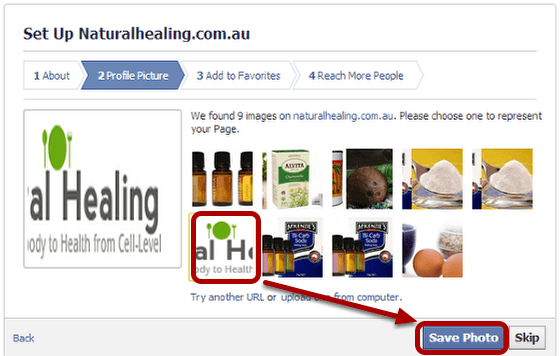
Don’t worry, we’ll change it later to something more appropriate, but hopefully one of the images will do while you are in setup mode. I’m selecting the logo – even though it looks weird. Then click on Save photo.
Add to Favorites
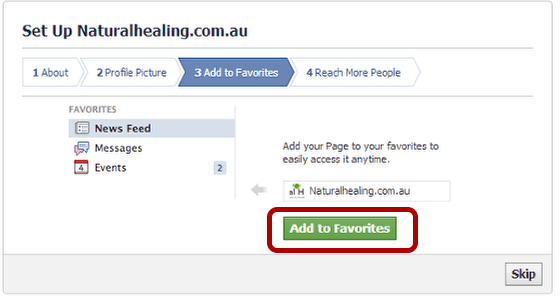
Next step is adding to your fave’s so you can access it easier later. Then click Next.
Skip the Advertising
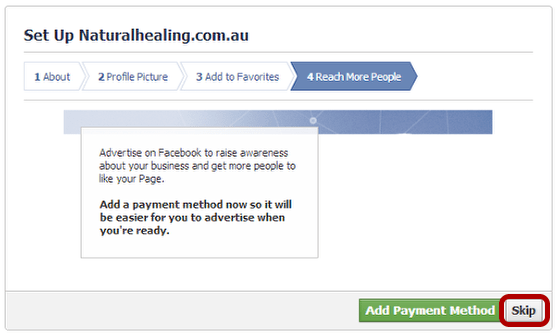
Skip the advertising/payment method step.
Edit Page > Update Page Info
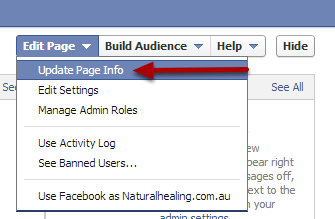
Your new page is now setup, but still have to do some tweaking.
Click on “Edit Page” up the top and select “Update Page Info”
Edit Each Step

There will be a list of things that you can choose to update. Such as the name (This is not the url, just what people will see when they click on your url as the “Name” of the page. So for example, I will be changing mine to “Natural Healing Australia”), Address, Company overview, a long description, founded, products, phone number, email, etc. Once you are done, click on “View Page” again.
Timeline Photo

A page looks empty and weird without a Timeline cover photo. So now click on “Add a Cover”
Upload Photo
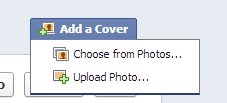
Choose “Upload Photo” and select a random image for the time being (I’ll show you how to create a cool one later).
Select Image to upload, click Open
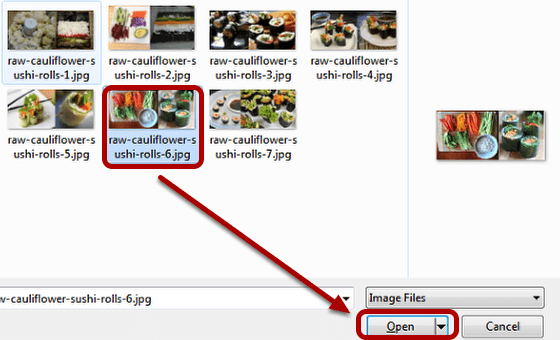
So browse to some images on your computer, select any (medium to large), then click on “Open” to upload it.
Drag to Reposition
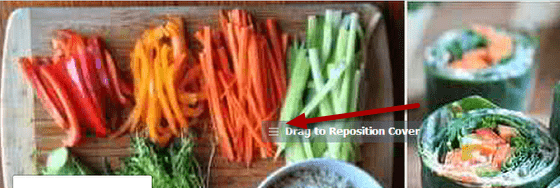
You can move your image slightly by clicking on the “Drag to Reposition Cover” with your mouse – holding down your mouse finger and moving (dragging) the image up/down or left/right.
Save Changes

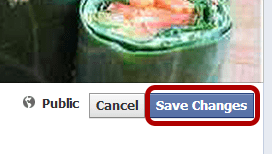
Once you are happy, click on “Save Changes”.
To access your page > Option #1 “Gear symbol”
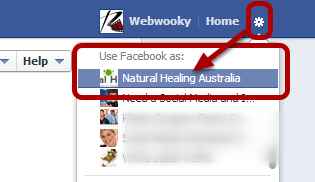
For now, whenever you want to access your new Facebook page, just login to facebook and click on the little “Gear” symbol (top right of your facebook page in Facebook) and choose your Facebook page.
To access your page > Option #2 “Home”

Another way to access your page (other than using the “Gear” symbol or typing in the url directly (i.e. http://fb.com/naturalhealing.com.au) is to go to your home page and do the same thing that you did in step #1 of this lesson.. click on “MORE” next to Pages, but this time just click on the page you want to access.
Facebook Page Part one – completed.

That’s all there is to setup a basic Facebook page on Facebook.
In the next lesson I’ll show you how to make a cool Profile image and Timeline photo which will look more professional than the images you have uploaded temporarily.
And then in the next lesson I’ll show you how to manage and promote your page.
If you’d like a downloadable PDF of this page to follow-along with, please support our site, and you’ll get immediate access to the free download:
[sociallocker]
Right-click on the image and choose “Save Target As” to download the PDF version.
[/sociallocker]


![[QA] 7 things people may not know about me](https://old.pennybutler.com/wp-content/uploads/2015/01/CAM03302.jpg)
